Base Views, Section View, Explosion Views, Partlist, Dimensions & Standards Explained
Siemens NX Drafting
Create Professional Drawings for Production and Catalogues
What you will learn
Create an automatic drawing frame
Create base and projected view
Section view, break-out section view
Explosion view
Dimensions and tolerances
Assembly drawing with Part List
Hole table, Ordinate Dimension
Drawings for catalogues
GD&T, and much more
All Lessons
Siemens NX Drafting Tutorial

b3d-1
What is needed first in a drawing, in fact the answer is quite simple: a drawing frame. Of course, an

b3d-2
Is a drafting 2 or 3 dimensional? What do I have to bear in mind when creating draftings in NX?
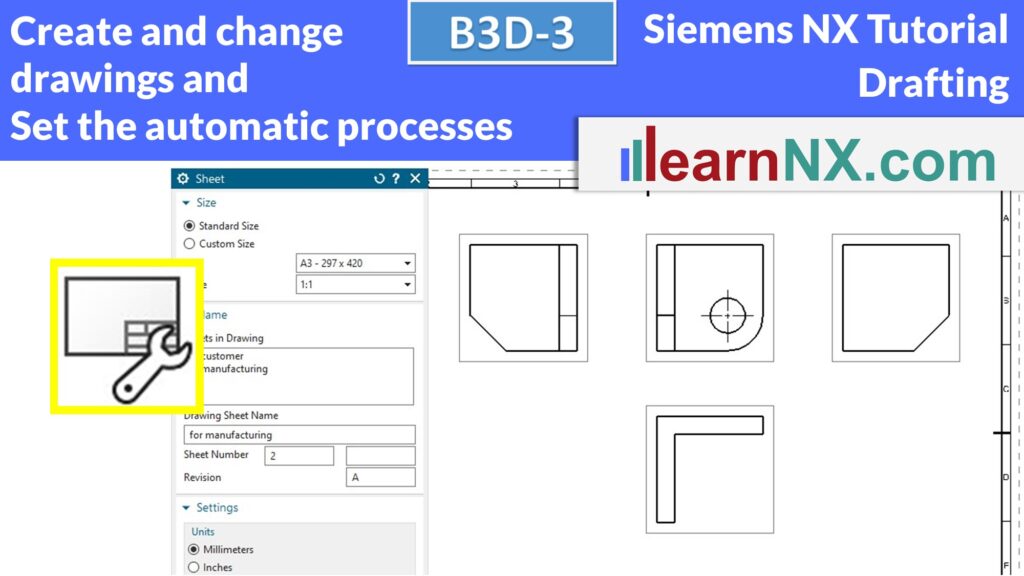
b3d-3
Create the first drawing and change size, scale, projection method, unit of the sheet according to your wishes. Up to

b3d-4
Create base and projected views, align them precisely, and define custom orientations. Learn to rotate views independently, manage view names

b3d-5
Despite shortened display, all dimensions remain correct. Any number of break lines can be created. Isometric views can also be
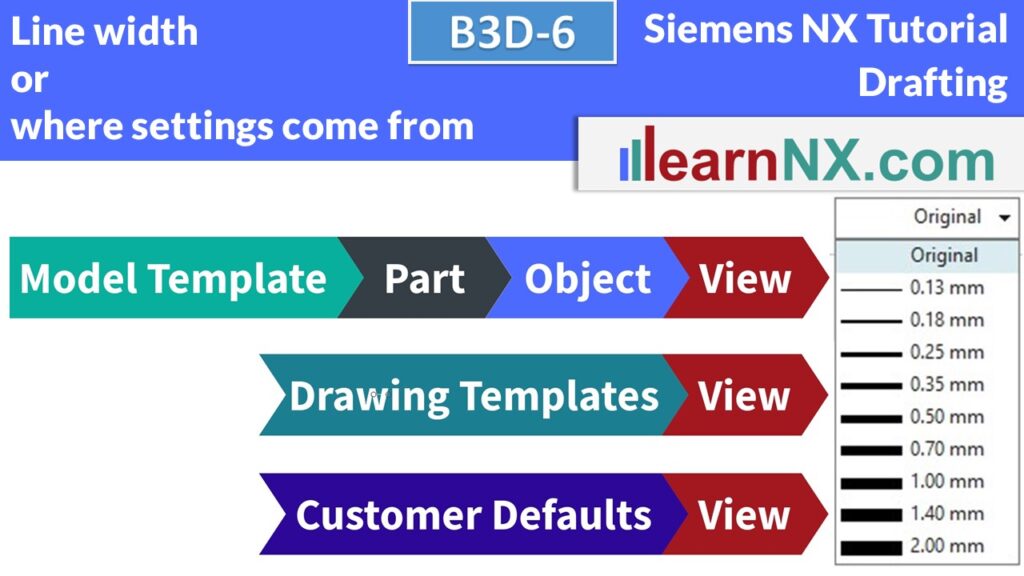
b3d-6
The body in 3D? The customer defaults? The model template? The Drawing Template? In fact, all four locations are possible

b3d-7
From full sections to partial cuts, you’ll learn how to define section lines, create detail views, and combine them with
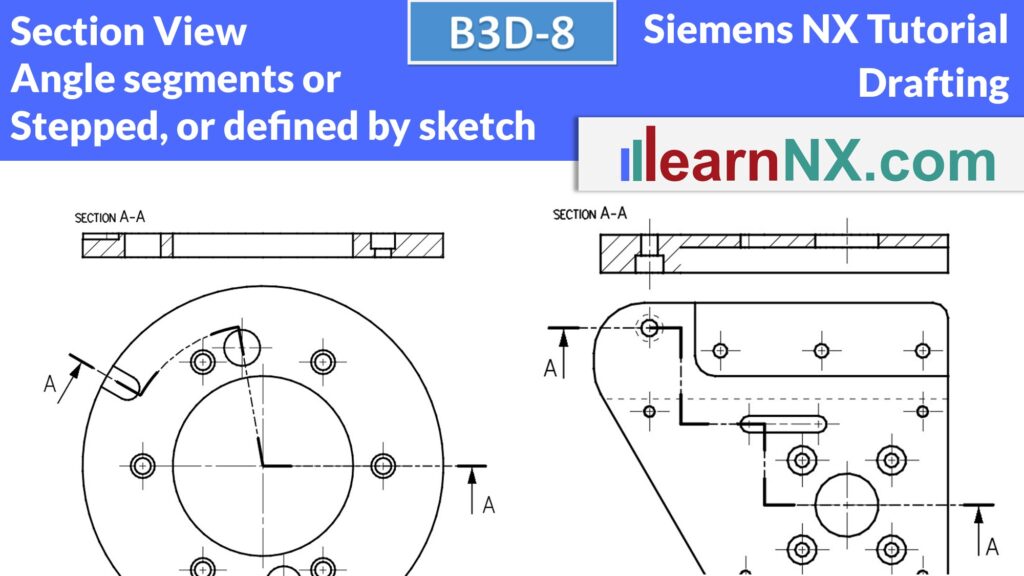
b3d-8
Section views with steps can be quickly created and modified, and the section line is created automatically or using a
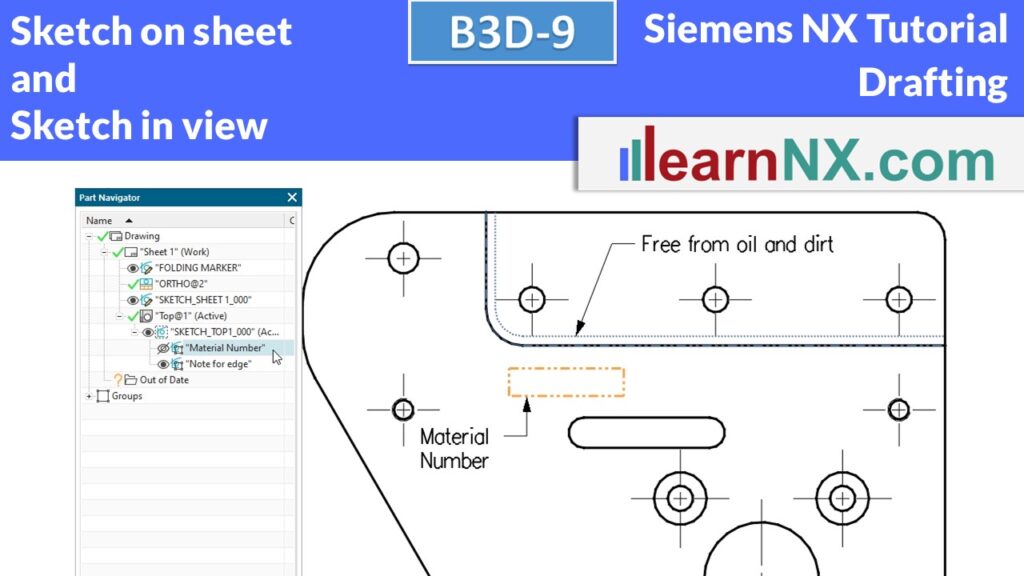
b3d-9
Sketches can emphasise areas in views, for example where the material number is to be stamped or special requirements apply.

b3d-10
A Break-out Section View lets you expose hidden details in a part, assembly, or even isometric view. Learn how to

b3d-11
Centre lines indicate axes of symmetry. They mark the centre of holes and hole axes. Or they indicate that several

b3d-12-1
From basic dimensions to tolerances and fits, learn how to apply accurate dimensions quickly, use automation tools effectively, and understand